Tuesday, September 25, 2012

Ready to Pop Baby Shower


The sweetest little baby girl has finally arrived! One of my very best friends, Jennifer, 
has finally given birth to her first baby! Welcome to the world baby Teagan!! 
I simply cannot wait to meet her!


Here is a look back at the baby shower I helped throw for her this summer...


I was in charge of the "pop" table. Everything to do with the word pop was on that table!
 I had old fashioned lollipops, Blow Pops, Tootsie Pops, Pop Rocks, bubblegum, 
Ring Pops, Rice Krispie treats (snap, crackle, pop!), confetti poppers and 
three kinds of homemade popcorn.


We provided white paper bags for guests to take home some of our goodies
 and I made this sweet little sign to encourage everyone to do so because lets face it,
 I certainly didn't need to take any of that stuff back home with me!


For the popcorn batches, I wanted one to be salty, one to be sweet and one 
to be a little bit of both. Here are links to the popcorn recipes I made. 
They all turned out to be extremely delicious and addicting, so be warned!


Kool-Aid Popcorn from TastyKitchen.com
Nacho Cheese Popcorn from Cooks.com


I also had the duty of providing one of the games, so to stay with the theme I gave all the girls a Pop Quiz about Jennifer. I asked them questions about her and Keith, about Jenny 
as a baby and some about her pregnancy too. Some of the questions were 
fill in the blank, some multiple choice and some true or false. Everyone really loved it 
and the winner got some major bragging rights!
Friday, September 21, 2012

Little Monster Birthday Bash

This monster bash was thrown for little Uriah's first birthday party. It was one of the hottest days
 of the summer, but a kiddie pool and some water balloons saved the day!


Mom made his big boy birthday tee with a big number one applique and the cutest little monster embroidered next to it. I recycled a large cardboard box to make the monster cutout photo opp.


Googly eyes tied everything to the theme and I had fun sticking them on everyone's cups. A sheet of paper and some craft paint turned this tissue box into a fun way to hold the silverware.


I made round sugar cookies and then decorated them with royal icing to look like eyeballs 
for the children's party favors.


Mom made the most adorable cupcakes. She used a marshmallow cut in half 
and a Junior Mint for each eyeball.


I made this monthly banner with photos of the birthday boy for each month, but it was soooo hot the tape wouldn't stick and I had nowhere to hang it. Everyone enjoyed in none the less!


The hit of the day (with the children and the adults) was definitely the photo booth props 
I made out of fun foam. I just cut the basic shapes out, added details with a thick
 permanent marker and then hot glued them to 1/4" wooden dowels. Couldn't be easier!


Tuesday, September 18, 2012

This Little Piggy Turned 2

My best friend commissioned me to throw her daughter's second birthday party. Like most toddlers, farm animals were a favorite with this little girl! Specifically pigs. So we ran with her fascination and did a pretty pink piggy picnic!


I made a birthday banner out of cotton prints and felt letters.
 Stuffed little piggies were scattered around that the birthday girl got to keep after the party.
 Mom made gorgeous pink topiary flower arrangements.
All of the guests wrote a little birthday note inside the cover of the book "All Pigs Are Beautiful."

 We made piggy cupcakes embellished with candy eyes and strawberry marshmallows. 
They were a huge hit!
Ayanna's pint sized smash cake.

Her little piggy invitations.

Friday, August 31, 2012

Sock Monkey Birthday

This month is all about parties to celebrate the official grand opening of BeMe Parties! I'll be going back and sharing parties we've done in the past with some DIYs and photos to help inspire you! Today I'm showcasing Porter's first birthday party and its all about the sock monkey!

A gift from grandpa, my old wagon restored like new.


I gave our guests puppy chow packaged in mason jars as party favors.


I decoupaged some photos of Porter onto 10" canvases for decoration.
An added bonus is that they now hang on the wall in our upstairs hallway!  


A photo banner with a snapshot of Porter for every month of the year. I used felt 
for the numbers and hot glued them on to clothespins for easy hanging. 


For a whimsical twist on party balloons, I hung these upside down in the entry way with 
crepe paper. Per Pinterest, I dropped a marble in each one before blowing them up 
so they hung better. It worked great!


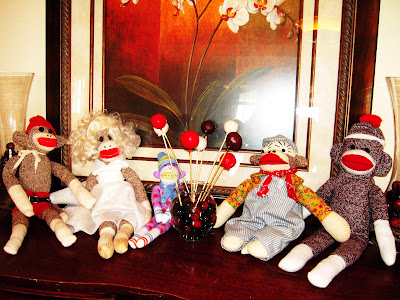
Of course, all of our sock monkey friends had to join in on the fun!


I decorated Porter's highchair with random lengths of ribbon. I sewed them on to a wide band of felt and then attached it to his chair with double stick tape. Mom made his smash cake. Homemade carrot cake with tinted cream cheese frosting. The hat was constructed out of an ice cream cone with a cake ball on top.


 The rest of us had cupcakes.


Fruit Kabobs were a big hit with the kids!


Mom's chocolate sock monkey whoopee pies with a peanut butter butter-cream frosting, mmm!


One of Porter's favorites at the time was a peanut butter and banana sandwich on
 whole wheat bread. I made the sandwiches up normally, but to make them 
more fun I used a biscuit cutter for the circle shape.


Coconut water with my own sock monkey labels. I learned something about coconut water that day, you either love it or hate it! I loved it, my husband hated it! Extra for me I guess.


I made a savory monkey bread with pepperoni and mozzarella. It was delicious! Come to think of it, I should really make this again! Here's the recipe if you want to give it a try!


And here's the birthday boy ready to tear up his smash cake!


Sunday, July 22, 2012

Easy Crystal Mobile

I had decided I was going to use up a jar of crystals I had collected over the years by assembling a mobile so they could dance in my window, catching the sun.  I had bought fishing line and copper wire, all I needed was the time to put it together. 

And then I saw a 'photo' mobile at the gift shop at the museum store.  It is designed to hold snapshots.  it ended up being the easiest  project ever.  I just hooked each crystal to the alligator clips, being careful to keep them balanced in weight, and voila, my mobile is complete!


Saturday, June 23, 2012

20 Ideas for Mac & Cheese Stir Ins

We all know kids love macaroni and cheese. So, why not take that opportunity and give them one of their favorite dishes while stocking it with protein and nutrients at the same time? Once a week I'll usually choose a flavor of boxed macaroni and cheese (we're big fans of Annie's Organic pasta) and add whatever we happen to have in the fridge (usually leftovers from dinner the night before). Porter loves it and so does my husband! Plus, it sure makes my life easier for the night.

Here are some ideas of things to stir in your child's favorite mac & cheese...Now, if some of these sound weird to you, just try them! I throw odd combinations at Porter just to see if he'll eat them and guess what--he does! I've put a lot of effort into raising him not to be a picky eater and let me tell you, this kid will eat anything. I know some kids are naturally going to be pickier than others, but I also believe that we as parents tend to project our own likes and dislikes on them as well. So be brave, think outside the box and let them decide what their favorites are!


            • tomato, Parmesan cheese & Italian seasoning
            • mushroom, onion & artichoke hearts
            • ham, green beans and hard boiled eggs
            • corn, black beans & tomato
            • ground turkey, steamed carrots & celery
            • broccoli, cottage cheese & baked chicken
            • shrimp, yellow squash and zucchini
            • pepperoni, tomato & basil
            • tuna, green pepper &dijon mustard
            • hot dogs & baked beans (drained)
            • hamburger, pickles & yellow mustard
            • bacon, asparagus & cheddar
            • ham & pineapple
            • chicken, bacon & ranch
            • Italian sausage, red & yellow peppers
            • ground turkey, taco seasoning & tomato
            • tuna, peas & garlic
            • chicken, feta crumbles & sliced olives
            • mushrooms, spinach & sausage
            • hamburger, Italian breadcrumbs & roasted tomato

Thursday, June 21, 2012

My Vices


Everybody has them. I am no exception. I have conquered some of my vices, but I have this nagging list in my head that I'd like to get rid of! I thought if I wrote about them publicly, I'd be inclined to finally kick them once and for all!


1. BITING MY NAILS--This one has been a struggle for as long as I can remember. Not only do I bite my nails, I ruin my cuticles by picking at them too. Its mindless. Its gross. Its a nervous habit I suppose.


2. SWEETS--I can't help myself. After every meal. All day long. I crave sweets. I'm not really sure how to kick it, but I need to curb my sweet tooth.


3. SWEARING-- Its not like I curse like a sailor, but having a little toddler that copies everything I do means its time to stop swearing all together. I've got a pretty good start on this one, just gotta keep it up so eventually I won't have to catch myself!


What are your vices? Do you have any suggestions that might help me with mine?

Tuesday, June 19, 2012

My Doctored Alfredo Sauce

I really love cooking all the way from scratch. I'm talking, rolling your own ravioli dough, stuffing it with your own concoction and topping it with sauce made from roasted tomatoes out of your own garden. That is bliss to me! Don't laugh...it really is. However, I am also a realist. Its just not gonna happen every night. So, a lot of the time when I make dinner its a little bit ready made and a little bit from scratch.
If you asked my husband what one of his favorite dinners is, he would probably tell you about my Chicken Fettuccine Alfredo. Its super easy and tastes delicious!


  • 2 tbs butter or olive oil
  • 1 medium yellow onion, diced
  • kosher salt
  • 10 oz sliced baby portabella mushrooms
  • 1 tbs minced garlic
  • 1/2 cup to 1 cup of dry sherry wine
  • jar of your favorite Alfredo sauce
  • cracked pepper


In a large skillet, start sauteing the onions in butter or olive oil over medium low heat. I usually add a little kosher salt at this step to help the onions sweat. After about 10 minutes, add the sliced mushrooms and stir to coat. When the onions are soft, add the garlic and saute for one minute.

Next, increase the heat to medium high and add the dry sherry. Allow this mixture to reach a boil. I listed a vague amount of sherry on the ingredient list because I love the flavor it adds to the sauce, so I am usually closer to a full cup but use whatever pleases your taste buds! 

Finally, simply add the jar of your favorite Alfredo sauce and season with fresh cracked pepper to taste. I usually just use whatever is on sale at the grocery store and it always tastes delicious! Serve this sauce with grilled or baked chicken and your favorite kind of pasta and you'll  be sure to want seconds!

Easy Binky Keeper

Porter was, IS the kind of baby that loves his binky...18 months old and we did not meet our goal of giving it up as he still uses it for bedtime. I spent so much time in the beginning searching for a pacifier! He lost them left and right. So we invested in a binky keeper, you know the kind you buy from the store that you can clip on to their clothing. Problem solved, right? Not so fast! He easily pulled the clip off his clothing and lost it again and again! I decided to take matters into my own hands (with the helpful guidance of my crafty mother). I used vintage mitten clips. They're metal. They have round teeth that really attach it to the clothes and there was no pulling it off!! Hallelujah! I simply sewed two 10" pieces of decorative ribbon together, wrong sides together. I looped one end through the pacifier ring and sewed the end of the ribbon to itself to secure it in place. I inserted the other end of the ribbon in the mitten clip and voila~a binky keeper that works in under five minutes!


Our Son, The Hugger

One of my goals as a mother is to raise affectionate children who openly express their emotions, the good and the bad. We say "I love you" every time we part and we always, always kiss goodbye and goodnight. At fifteen months Porter was already saying "I love you", his first official sentence. It sounds more like I luh you (all one word), but oh so sweet nonetheless! He is eighteen months old now and really starting to interact with his buddies. I've captured a couple displays of affection he shared with his friends. He just melts my heart!